Short answer upfront (what this strategy is and why it works):
The Supply and Demand strategy by Sam Seiden is a price-action trading approach that focuses on identifying areas where large institutional buy or sell orders previously caused strong market moves. These zones often act as future turning points. Traders use them to find high-probability entries, clear risk levels, and favorable reward-to-risk trades across Forex, stocks, and crypto.
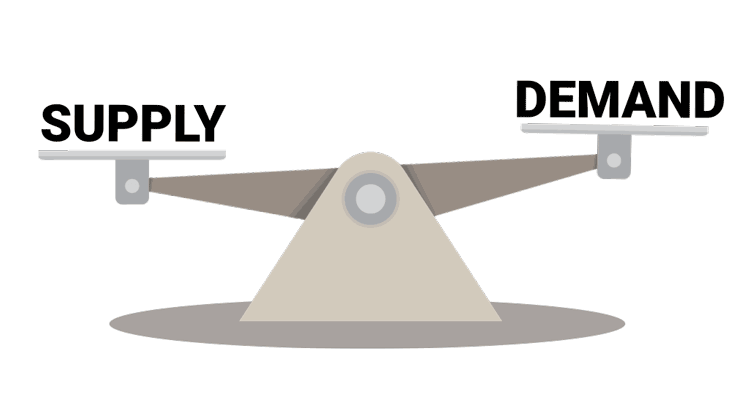
What Is the Supply and Demand Strategy by Sam Seiden?
The Supply and Demand strategy, popularized by Sam Seiden, is based on a simple idea:
Markets move because of imbalances between buyers and sellers.
👉 When demand exceeds supply, price rises.
👉 When supply exceeds demand, price falls.
Sam Seiden’s contribution was turning this basic economic concept into a repeatable, rule-based trading methodology that retail traders can apply on real charts.
Instead of using lagging indicators, this strategy focuses on:
-
Raw price movement
-
Institutional order flow footprints
-
Key price zones where aggressive buying or selling previously occurred
These zones are called supply zones and demand zones.
Why the Supply and Demand Strategy Attracts Forex Traders
Retail forex traders are drawn to this approach for several reasons:
-
It works on any timeframe (scalping, day trading, swing trading)
-
It applies to any market (Forex, indices, stocks, crypto)
-
It provides clear entries, stops, and targets
-
It aligns with institutional trading behavior, not retail indicators
-
It avoids overcomplicated setups
Search intent behind this topic usually falls into these categories:
-
“How does Sam Seiden supply and demand work?”
-
“Is supply and demand better than support and resistance?”
-
“Best supply and demand strategy for forex”
-
“How to draw supply and demand zones correctly”
This article addresses all of them.
Core Concept: Institutional Order Imbalances
Sam Seiden’s methodology is built on one key assumption:
Strong price moves don’t happen because of news or indicators. They happen because large institutions place unfilled orders.
Banks and institutions cannot enter their full position at once.
They leave behind unfilled orders, which price often returns to later.
Those price areas become:
-
Demand zones → unfilled buy orders
-
Supply zones → unfilled sell orders
When price revisits these zones, the remaining orders can push the market again.
Supply Zones vs Demand Zones (Clear Definitions)
Demand Zone (Buying Area)
A demand zone forms when:
-
Price moves sideways briefly
-
Then explodes upward with strong momentum
This suggests aggressive institutional buying.
Trader expectation:
Price may bounce higher when it returns to this zone.
Supply Zone (Selling Area)
A supply zone forms when:
-
Price consolidates
-
Then drops sharply with speed
This suggests heavy institutional selling.
Trader expectation:
Price may reverse lower when it revisits this zone.
Supply and Demand vs Support and Resistance
Many traders confuse these concepts. They are not the same.
| Support & Resistance | Supply & Demand |
|---|---|
| Based on repeated touches | Based on explosive departures |
| Often subjective | Rule-based |
| Retail-focused | Institutional-focused |
| Wide price areas | Precise zones |
| Often breaks easily | Strong first retests |
Sam Seiden often criticized traditional support and resistance for ignoring order flow mechanics.
How to Identify High-Quality Supply and Demand Zones
Not all zones are equal. Sam Seiden emphasized quality over quantity when it comes to trading.
Key Criteria for Strong Zones
-
Strong Departure
-
Fast, impulsive move away from the base
-
Large candles, little overlap
-
-
Little Time Spent at the Base
-
Fewer candles = fewer orders filled
-
More unfilled institutional orders remain
-
-
Fresh Zones
-
Price has never returned since the initial move
-
First retest has the highest probability
-
-
Clear Structure
-
Clean consolidation before the move
-
No messy price action
-
The Base: Where Zones Are Born
The base is the price area where institutions accumulate or distribute orders.
Common base structures:
-
Small ranges
-
Tight consolidation
-
Short pauses before strong moves
Sam Seiden categorized bases into patterns such as:
-
Rally-Base-Rally (RBR)
-
Drop-Base-Drop (DBD)
-
Rally-Base-Drop (RBD)
-
Drop-Base-Rally (DBR)
These patterns help traders classify zone strength and intent.
Entry Techniques in Sam Seiden’s Strategy
There are three common entry styles:
1. Set-and-Forget Entry
-
Place a limit order at the zone
-
Stop loss beyond the zone
-
No confirmation required
Pros: High reward-to-risk
Cons: Requires strong zone selection
2. Confirmation Entry
-
Wait for price action confirmation
-
Use lower timeframe structure
Pros: Higher win rate
Cons: Lower reward-to-risk
3. Hybrid Entry
-
Partial position at the zone
-
Add after confirmation
This balances precision and probability.
Stop Loss and Risk Management
Risk management is non-negotiable in Sam Seiden’s framework.
Stop Loss Placement
-
Always beyond the zone
-
If price breaks the zone, the imbalance is invalidated
Risk Guidelines
-
Risk 0.5%–1% per trade
-
Aim for minimum 1:3 reward-to-risk
-
Avoid stacking correlated trades
This strategy is designed to lose small and win big.
Timeframe Alignment (Top-Down Analysis)
Sam Seiden strongly advocated multiple timeframe analysis.
Typical Structure
-
Higher timeframe → Identify zones (Daily / H4)
-
Lower timeframe → Execute entries (H1 / M15)
This aligns trades with institutional flow and filters weak setups.
Common Mistakes Retail Traders Make
-
Drawing zones everywhere
-
Trading zones that are already tested
-
Ignoring trend context
-
Using indicators to “confirm” zones
-
Placing stops inside the zone
The strategy is simple, but discipline is hard.
Is the Supply and Demand Strategy Profitable?
The strategy itself doesn’t print money.
Execution and discipline do.
Traders who succeed with this method usually:
-
Trade fewer setups
-
Respect risk management
-
Focus on fresh, high-quality zones
-
Journal every trade
Used correctly, it offers a structural edge, not a shortcut.
Who Is Sam Seiden?
Sam Seiden is a former professional trader and educator known for teaching institutional supply and demand concepts to retail traders. He has trained thousands of traders worldwide and is frequently cited in professional trading education circles.
His approach strips trading down to cause and effect, not indicators.
Supply and Demand Strategy: Best Use Cases
-
Forex swing trading
-
Index trading (S&P 500, DAX, NASDAQ)
-
Crypto spot and futures
-
Stocks with high liquidity
Note: Low-liquidity markets reduce effectiveness.
FAQ: Supply and Demand Strategy by Sam Seiden
Is supply and demand better than indicators?
It depends. Supply and demand focuses on price cause, while indicators react to price. Many traders combine both, but price leads indicators.
Does this strategy work for beginners?
Yes, if beginners focus on few high-quality zones and strict risk management.
How long does it take to learn?
Expect 3–6 months of focused chart time to build confidence and consistency.
Can supply and demand fail?
Yes. No strategy has a 100% win rate. That’s why risk control is essential.
Is this strategy still relevant today?
Yes. Institutional order behavior hasn’t changed. Only technology has.
Final Takeaway
The Supply and Demand strategy by Sam Seiden is not a magic system. It’s a framework for understanding why price moves, not just where it moved. When applied with discipline, patience, and proper risk management, it gives traders a logical, repeatable edge rooted in market mechanics—not indicators or predictions.
Want to dive deeper?